

Designing Our Dome
AFFILIATE LINKS BELOW
For people who have never built or designed a home before, we’ve had a lot of fun figuring out how everything works! Thankfully we have a great support system and knowledgeable people surrounding us.
Designing out dome(s) started out with pencil and paper doodles. After measuring out the space we plan to use on our land, we created a loose sketch of the area.

An important step we took was purchasing graph paper so that we could draw things to scale with more accuracy. (Always remember to write your key somewhere on each page!) Once we had a solid sketch of the area and available space to build on (with set backs and trees considered), we created a large site map. Then we got crafty and made some circles(to scale) to move around on the map.

With that information we were able to figure out the final shape/configuration of all the domes together. With the layout set (kind of) we then were able to use an application called SketchUp (link to website) to create a 3D drawing of our space. This helped us to visualize and get on the same page. It also is great for planning additional height we will be adding to some of the smaller domes. Some of our domes will be what is considered Roman building style. The half sphere will be on top of x number of non-angled rows of block.
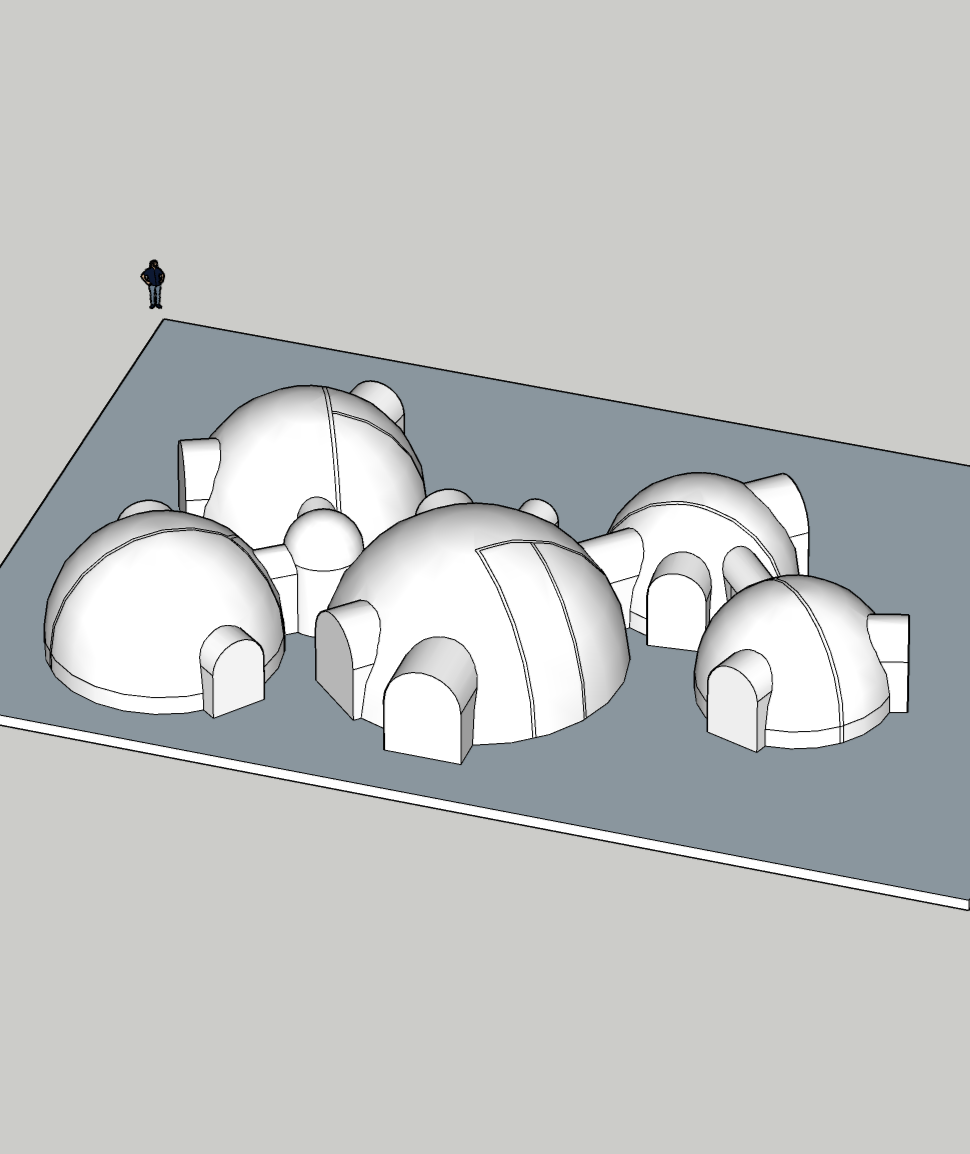
SketchUp is super user friendly and easy to learn if you have the time to put in. The application has just recently become available on the iPad, but the general YouTube videos on the app itself are pretty easy to translate.
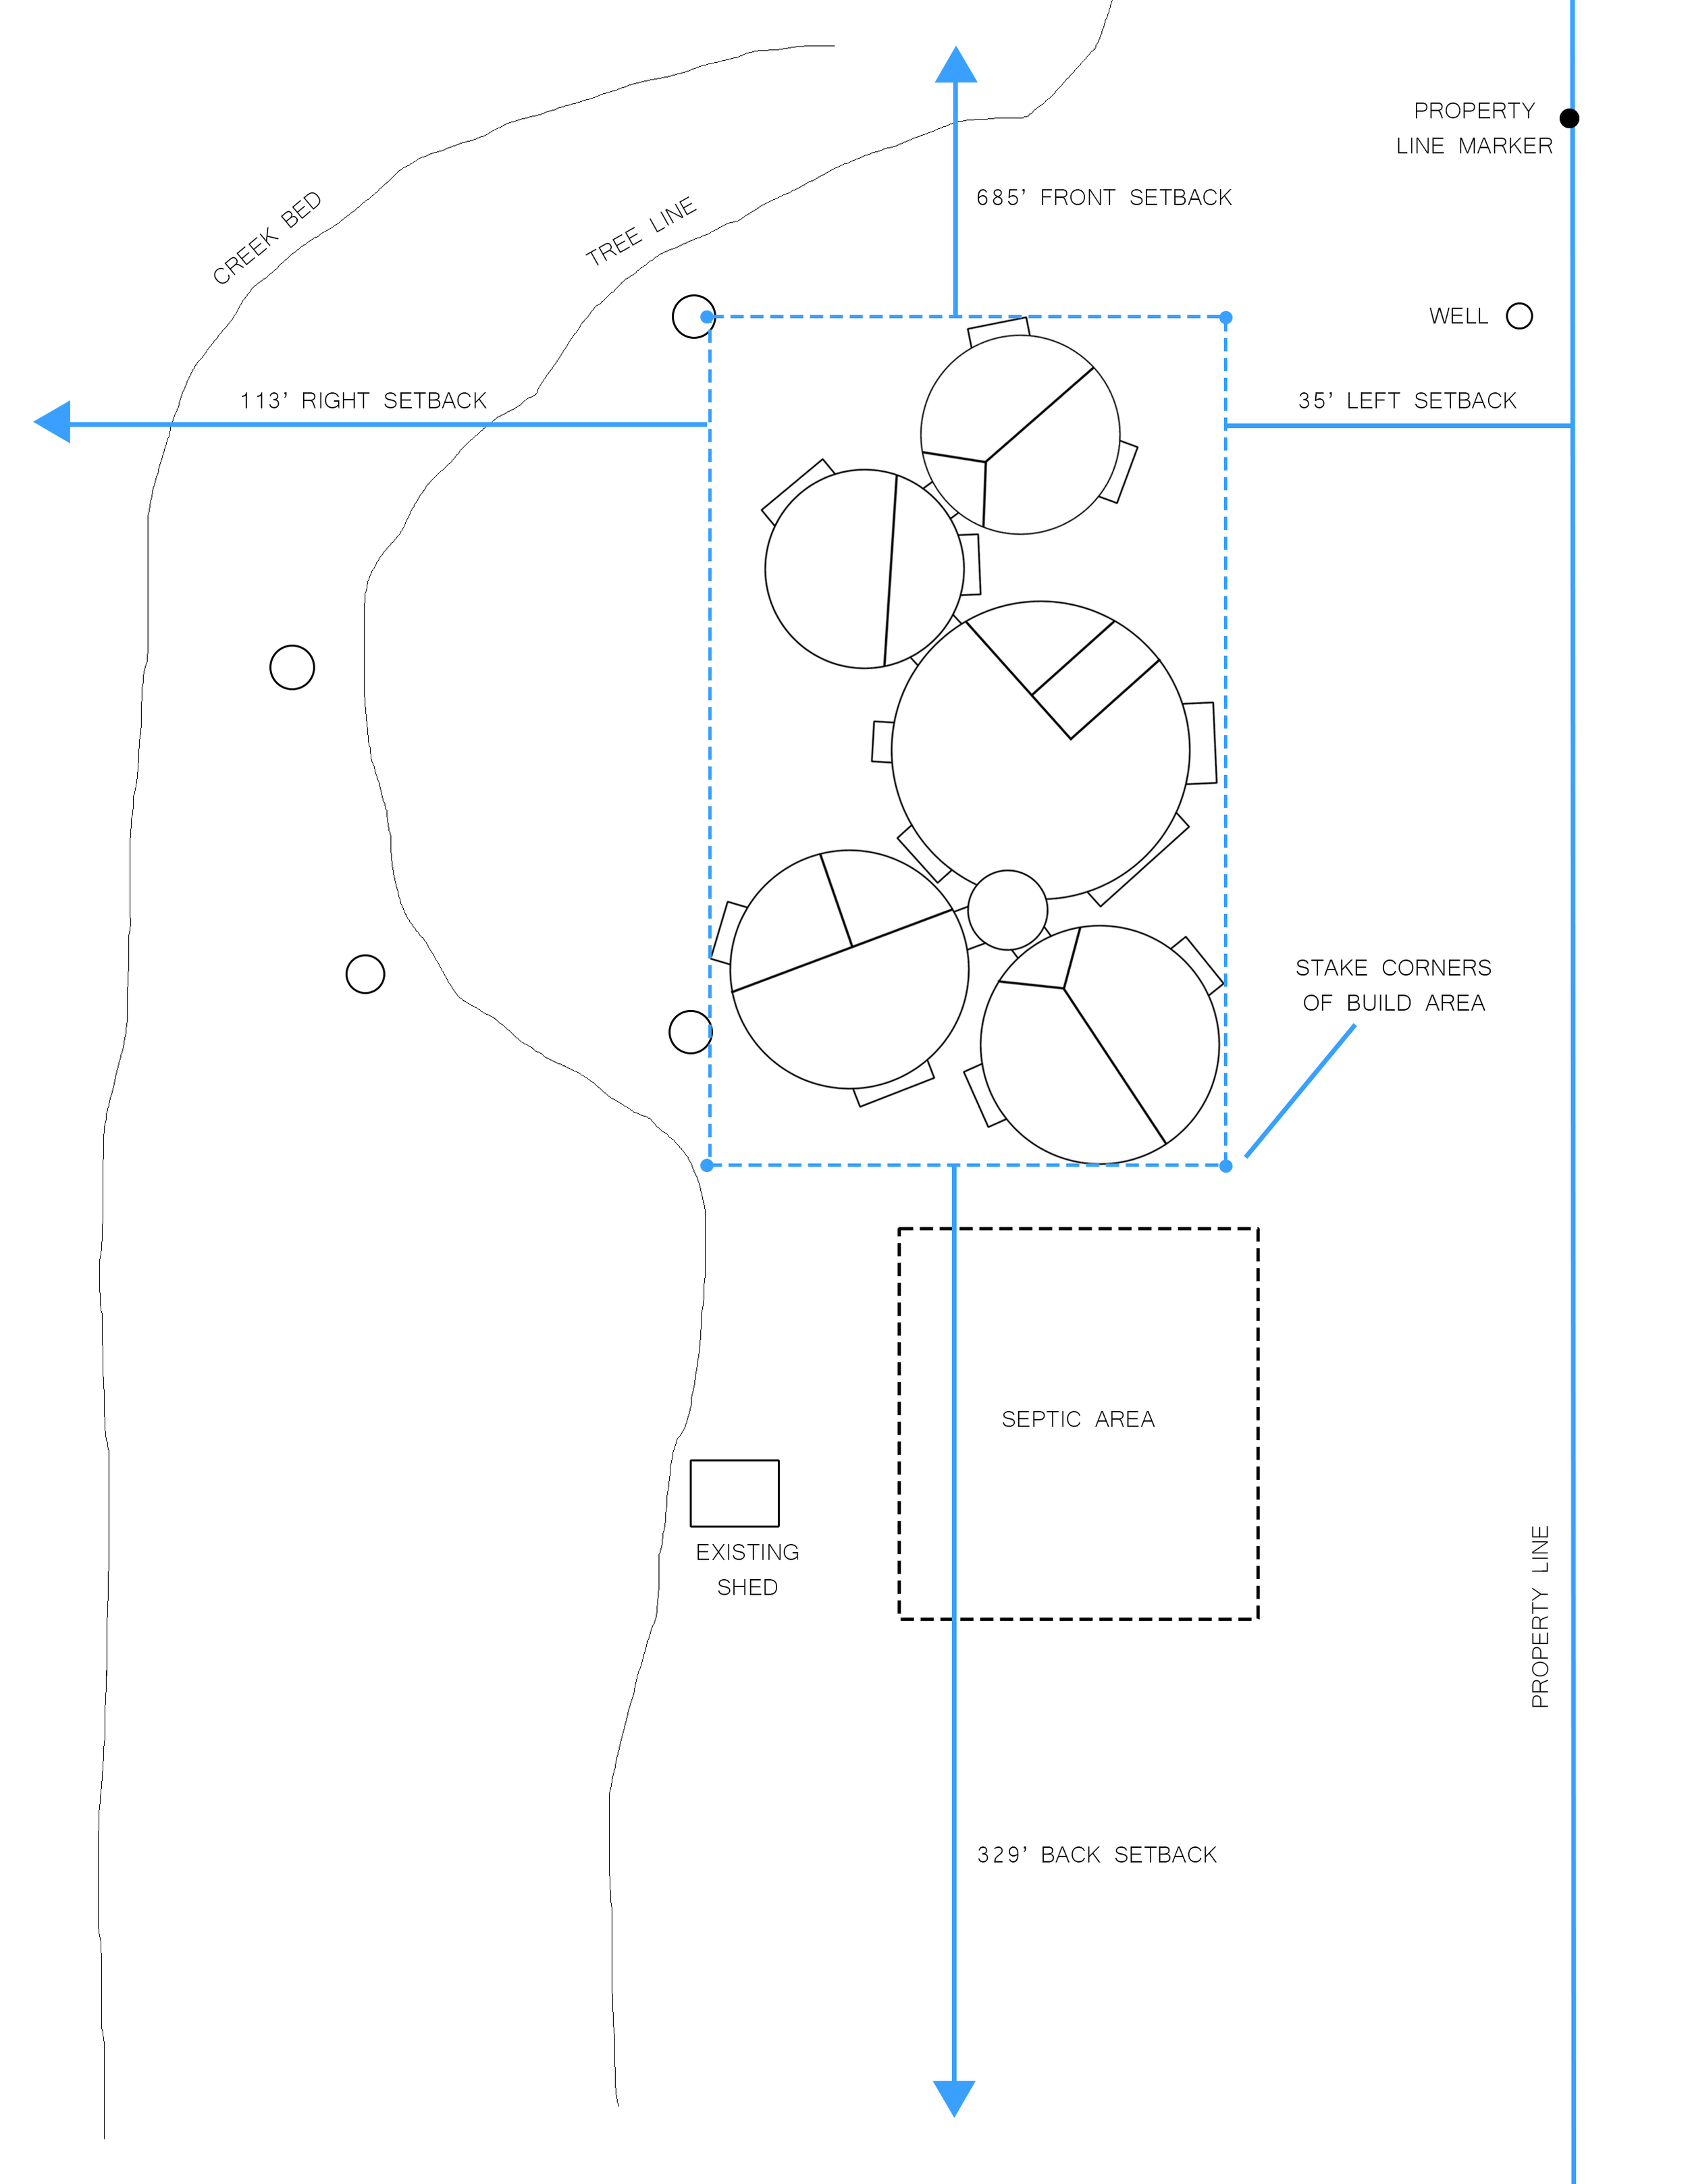
Once we felt confident in all the prep work we did, we set the stakes in our proposed spots and submitted our zoning application. Thankfully our area didn’t give us a difficult time with this unique building style, and our application was approved!